
In this blog post, I will teach how to make your own cold foam. Cold foam is what I consider one of those optional touches that takes a drink from average to extraordinary! And the best part it that cold foam is so simple to make.
Are you also looking for the perfect latte recipe to top with your cold foam? Well then check out my easy honey latte recipe!
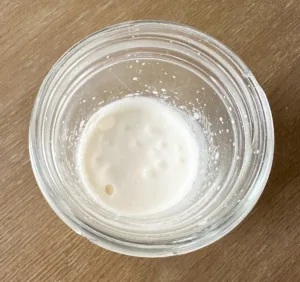
What is cold foam?
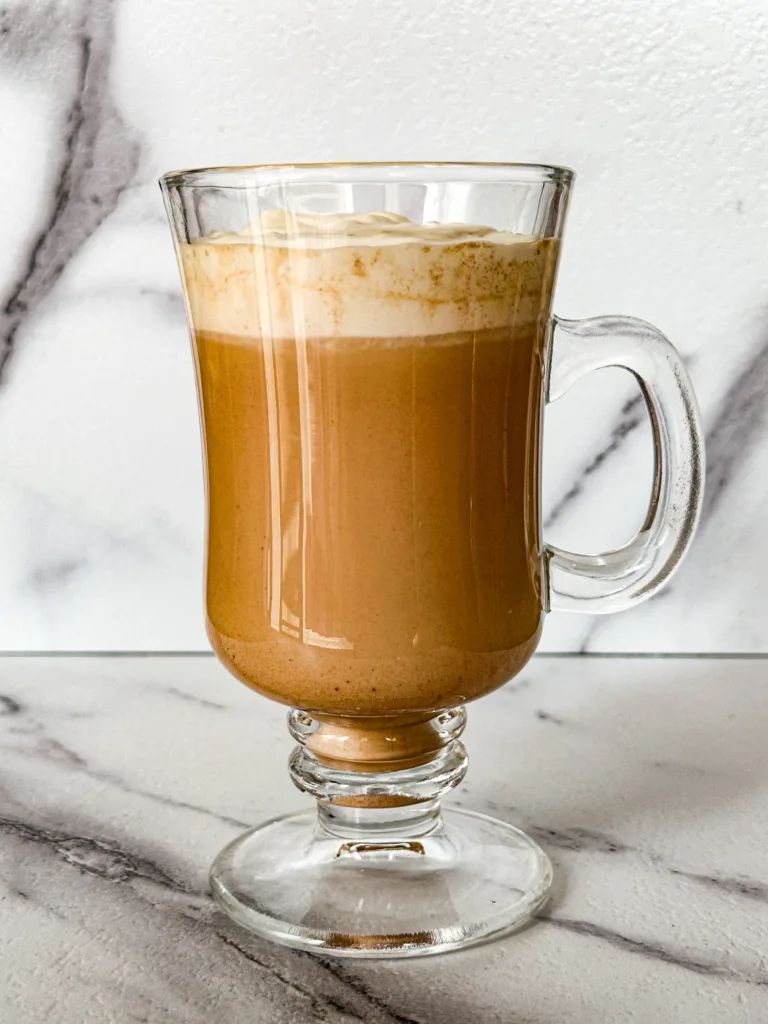
Cold foam is a specialty topping that is typically milk-based, frothed, and served on top of iced beverages such as iced coffee or lattes.
Additionally, cold foam is creamy, velvety, and almost cloud-like in texture! It’s honestly a dream to have with iced coffee and lattes!
Why I love this recipe
This cold foam recipe is so simple to make, perfect for even someone who considers themself to be a beginner.
Also, cold is really what I think is the bridge between a refreshing iced coffee and a decadent sweet treat!
Cold foam vs. Whipped cream: What’s the difference?
Cold foam: Cold foam is pourable but thick and it’s cold. It also typically has a lower, milk-based fat content then whipped cream.
Whipped cream: Whipped cream is more structured and has a higher milk-based fat content then cold foam.
The best type of milk for stiff cold foam
When it comes to getting that perfect, pillowy peak, the type of milk you choose makes a huge difference! While there is a bit of science behind it, I always recommend going with what your family loves most. 🙂
- Whole Milk (My Top Choice!): This is what I use at home because it’s a staple for my family. While it’s slightly “wetter” than other foams, it creates a rich, velvety texture that feels so incredibly decadent. If you want that classic coffee shop experience, whole milk is the way to go.
- Non-Fat (Skim) Milk: If you are looking for the absolute stiffest, tallest foam possible, skim milk is actually the winner. Because it has more protein relative to fat, it holds air bubbles like a charm—perfect if you want your foam to sit high on top of the glass!
- Oat Milk: For my dairy-free friends, I highly recommend using a “Barista Edition” oat milk. It’s specially made to froth up just like dairy, giving you a thick and creamy finish that won’t immediately dissolve into your drink.
Pro Tip: I personally love using whole milk when topping my honey latte. The creaminess of the foam perfectly balances out the floral sweetness of the honey for the ultimate morning treat!
How to make cold foam without a hand frother
You don’t need a fancy electric frother to get that perfect, pillowy texture at home! If you aren’t ready to invest in more kitchen gadgets, you likely already have one of these items in your cupboard that will work just as well:
- The Mason Jar Method: This is a “no-tool” hack. Simply pour your milk and syrup into a small mason jar, screw the lid on tight, and shake vigorously for about 30–60 seconds. You’ll be surprised at how much it doubles in volume!
- A French Press: If you have one for your morning brew, it actually makes the best cold foam and is my favorite hack. Pour your milk into the carafe and pump the plunger up and down quickly for about 20 seconds. This creates a super dense, micro-foam that looks professional.
- A Whisk or Blender: If you’re making a larger batch for the whole family, you can use a high-speed blender or even a handheld whisk. Just be careful not to over-mix, or you’ll end up with something closer to whipped cream than pourable foam!
How to get that coffee shop texture: Starbucks copycat
If you’ve ever wondered why the cold foam at your favorite coffee shop tastes so much like melted ice cream, I have the secret for you! Most coffee houses (like Starbucks!) use a specific “sweet cream” base rather than just plain milk.
To recreate that exact texture in your own kitchen, you’ll want to follow this simple ratio:
- 2 Parts Heavy Cream: This provides the richness and that “stable” structure.
- 1 Part Milk: (I use whole milk!) This thins out the cream just enough so it stays pourable.
- Syrup of Choice: Traditionally, they use vanilla, but this is where I love to swap in my maple or cheesecake syrups!
The Method: Instead of frothing just milk, mix these three together and then froth. You’ll end up with a foam that is incredibly thick, sweet, and stays on top of your drink until the very last sip. It truly turns your morning coffee into a decadent treat!
5 sweetener ideas for flavored cold foam
One of my favorite things about making cold foam at home is how easy it is to customize the flavor! While you can always use a plain sweetener, adding a pump or two of flavored syrup takes your coffee to a whole new level. Here are five ideas to get you started:
- Maple Syrup: This is a staple in my kitchen! It adds a warm, earthy sweetness that is perfect for a cozy morning. And the best part, it’s free of refined sugar!
- Cheesecake Syrup: If you want something that tastes like a dessert in a glass, this is it. It’s creamy, tangy, and pairs beautifully with fruit-flavored iced teas or a dark roast coffee. It’s hands down one of my personal favorite coffee syrups!
- Vanilla Bean: You can’t go wrong with the classic! Use a splash of vanilla extract or a pump of vanilla syrup for that iconic “coffee house” flavor.
- Salted Caramel: For that perfect mix of sweet and salty, drizzle a little caramel sauce into your milk before frothing. It’s incredibly indulgent!
- Brown Sugar Cinnamon: I love mixing a teaspoon of brown sugar and a pinch of cinnamon into the milk. It tastes just like a cinnamon roll and smells amazing.
Note: For most of these, I usually start with about 1–2 pumps (or tablespoons) of sweetener and adjust from there based on how sweet I want my drink that day!

How to make sugar-free/keto cold foam
If you’re watching your sugar intake or following a keto lifestyle, you don’t have to miss out on the cold foam craze! It is incredibly easy to swap out a few ingredients and still get that same luxurious topping.
- The Best Milk for Keto: Instead of whole milk or skim, use a combination of heavy whipping cream and a splash of unsweetened almond milk. This keeps the carb count very low while giving you a super stable foam.
- Swap Your Syrups: There are so many amazing sugar-free syrups available now! I love using a sugar-free vanilla or caramel syrup.
- Natural Sweeteners: If you prefer to stay away from pre-made syrups, a few drops of liquid monk fruit or stevia work perfectly. Just add a tiny drop of vanilla extract for that classic flavor.
Pro Tip: Since sugar-free syrups are often thinner than traditional ones, you might find that your foam froths up even faster. Start with a little less than you think you need—you can always add more!
Equipment needed
A glass cup or jar (with lid if doing the jar method)
Measuring spoons
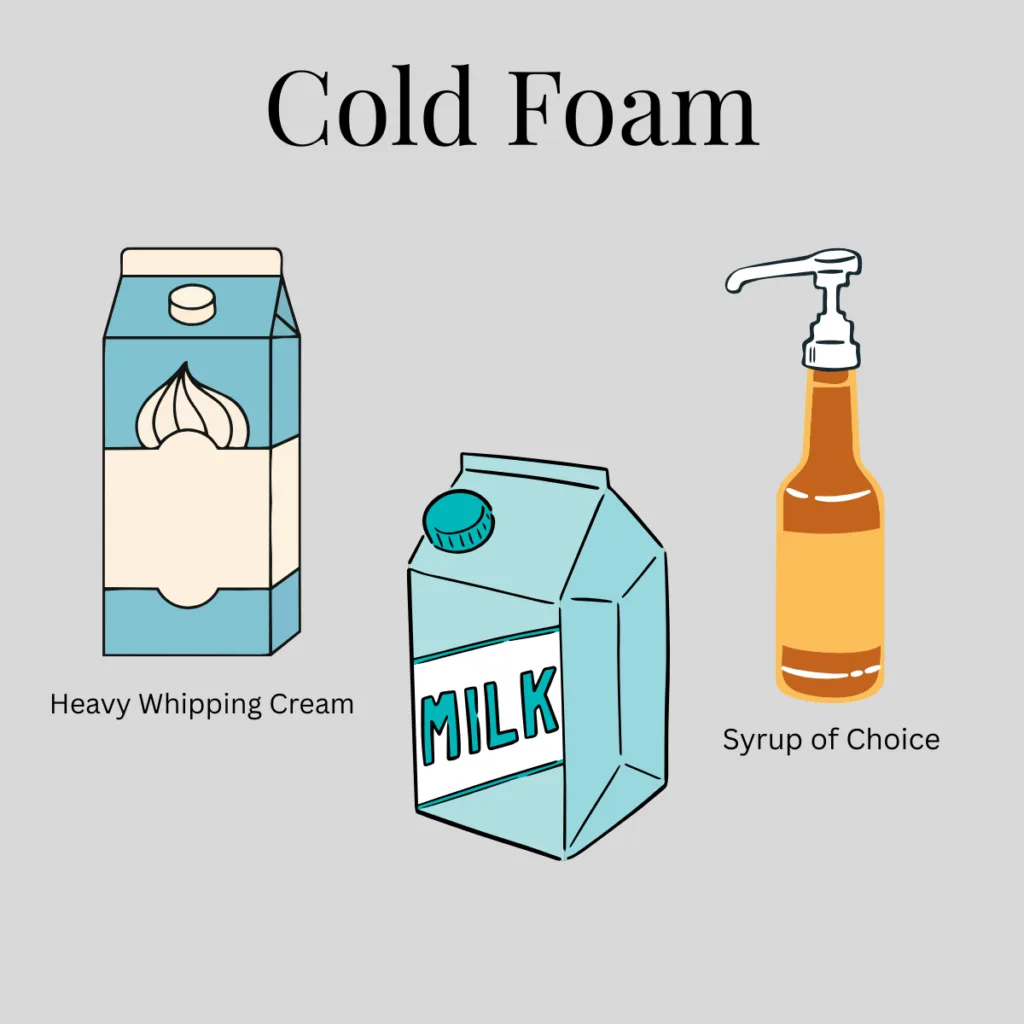
Ingredients
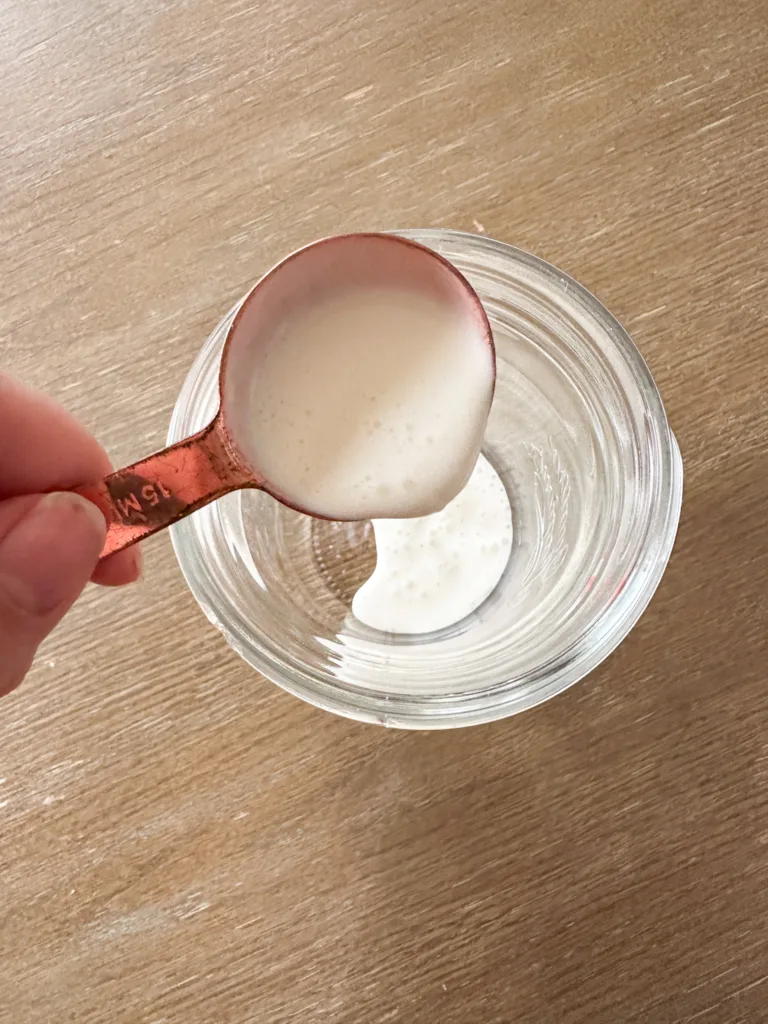
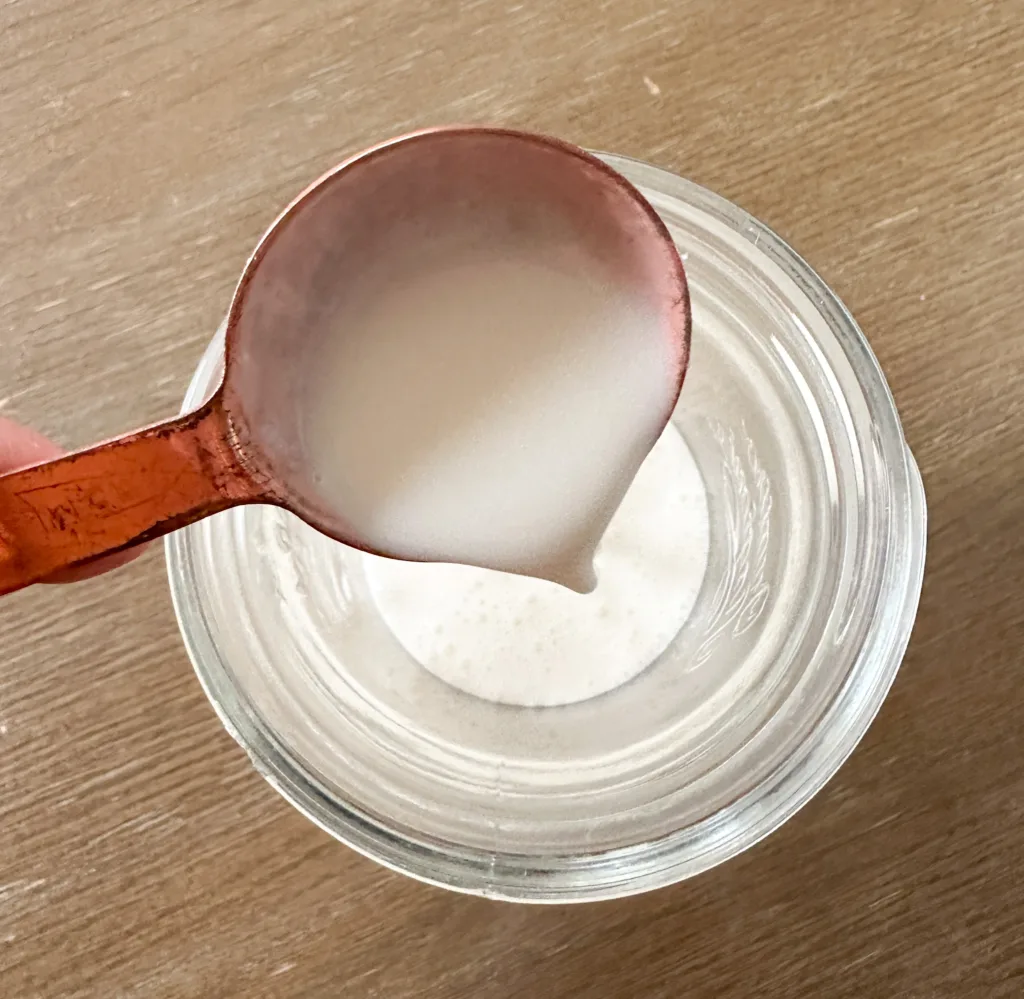
2 tablespoons of heavy whipping cream
1 tablespoon of milk
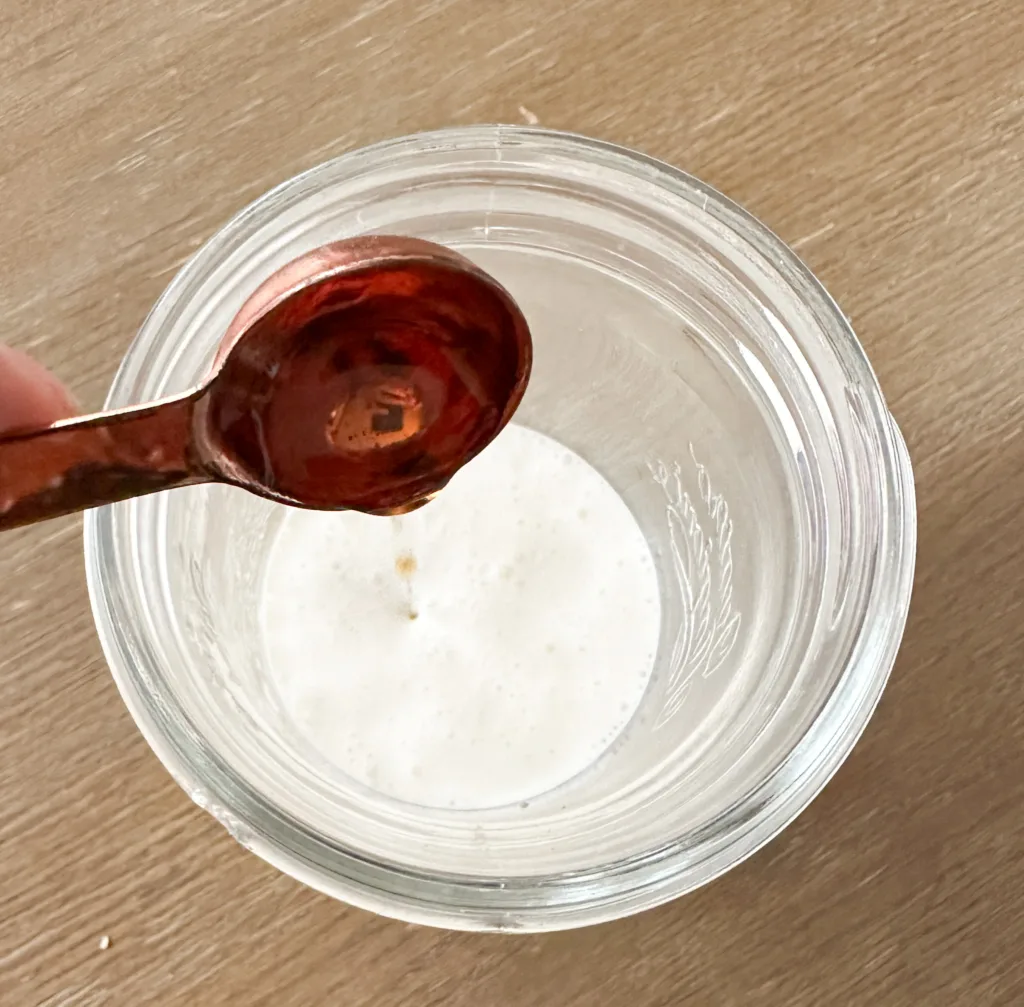
1/2-1 teaspoon of syrup of choice
A drop of vanilla extract- optional
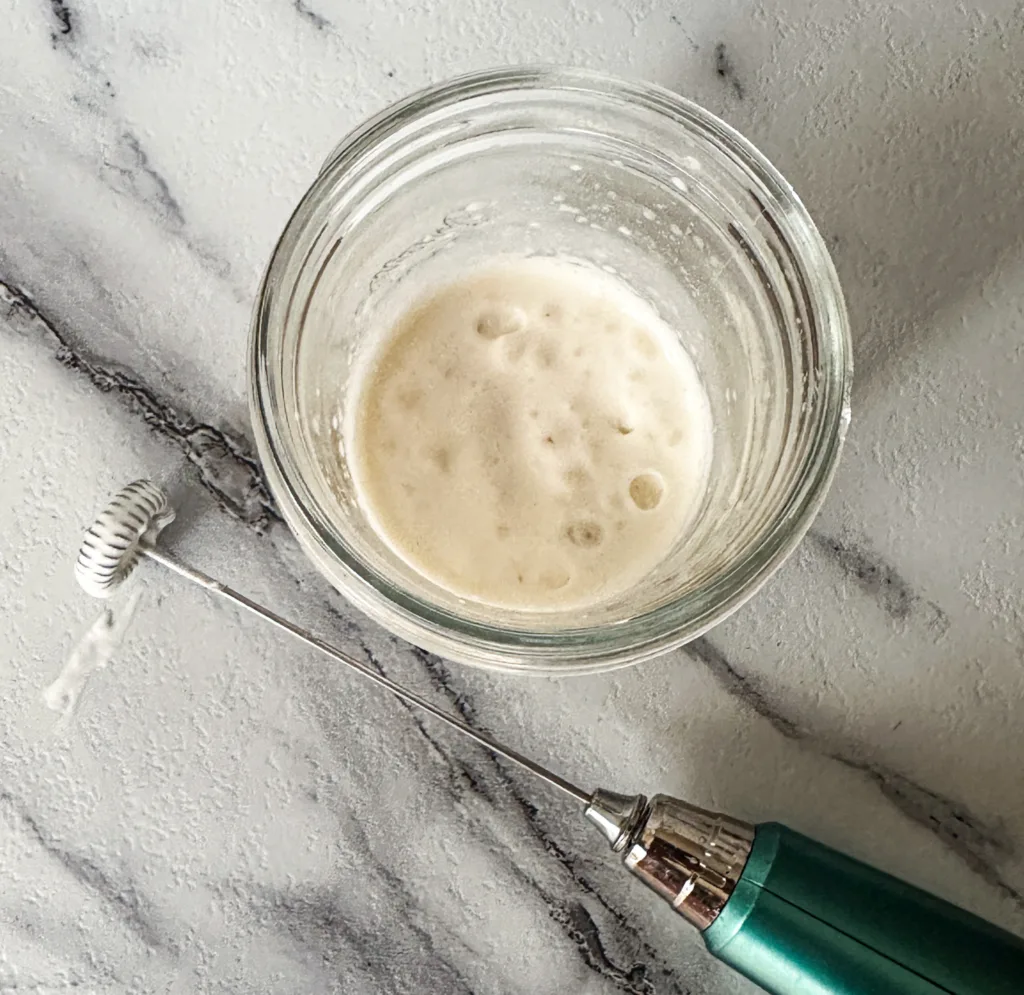
How to make cold foam
Frother Method:
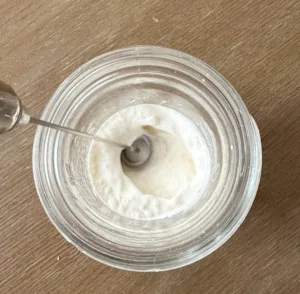
Add heavy whipping cream, milk, syrup, and vanilla (if using), to a glass cup or jar and froth for about 10 seconds until the texture is airy and soft.

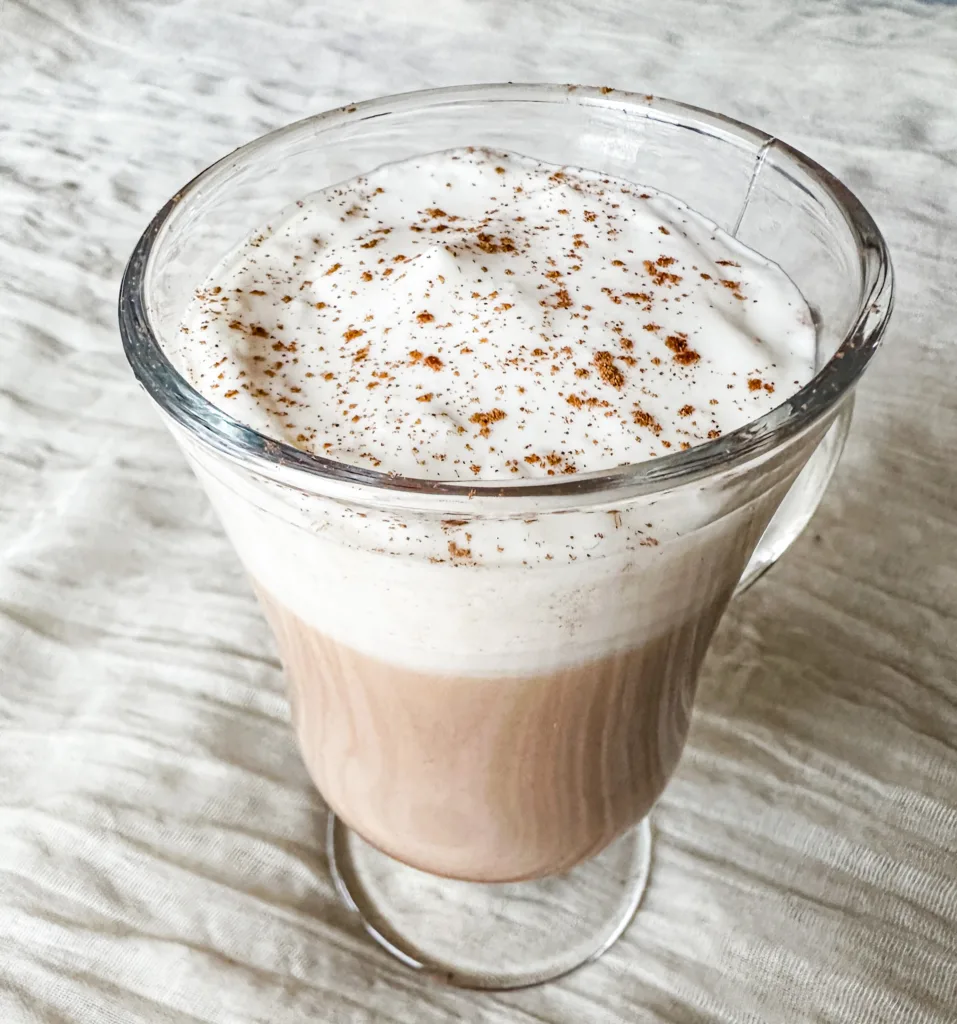
Pour cold foam on top of drink and enjoy!
Jar Method:
Add heavy whipping cream, milk, syrup, and vanilla (if using), to a glass jar with a lid. Seal and shake the jar for 10 to 15 seconds until texture is airy and soft.
Pour cold foam on top of drink and enjoy!

How to store cold foam
I would recommend just making a single serving fresh, because it tastes the best!
However, if you have to, keep the cold foam in a sealed jar or container in the fridge for up to one day.
Best drinks to pair with homemade cold foam
Iced Coffee & Cold Brew: The classic choice! The foam sits right on top and slowly melts into the dark coffee.
My Signature Honey Latte: I mention this one a lot because it is just that good. The cold foam adds a layer of creaminess that makes the honey pop.
Iced Matcha or Chai: Cold foam isn’t just for coffee! Try topping an iced matcha latte with some vanilla cold foam for a “cloud tea” vibe.
Iced Butterfly Pea Tea: Since this tea has such a beautiful blue hue, a white layer of cold foam on top looks absolutely stunning and makes for a very “Instagrammable” drink.
Can you put cold foam on hot coffee?
Technically, yes! But keep in mind that because cold foam is chilled, it will melt into hot coffee much faster than it does in an iced drink. It basically turns into a very creamy, frothy head of milk—still delicious, just not as “pillowy” for long!
Frequently asked questions
Why is my cold foam deflating?
This usually happens if the milk is too warm or if the fat content is too low without enough protein to back it up. For the best results, make sure your milk is ice-cold straight from the fridge before you start frothing!
Can I make cold foam ahead of time?
While you can store it in the fridge for a few hours, cold foam is definitely best enjoyed right after you make it. Because it’s aerated, the bubbles will naturally start to settle over time. If you do make a batch in advance, just give it a quick 10-second re-froth before serving to bring that pillowy texture back to life!
Why isn’t my non-dairy milk frothing?
If you’re using almond or soy milk and it just isn’t “foaming up,” it’s likely due to a lack of stabilizers. Most standard nut milks are quite thin. For the best results without dairy, always look for the “Barista Edition” on the carton—these are specifically designed to create that thick micro-foam we’re looking for!
How long does the “Starbucks” sweet cream base last?
If you make the copycat version using heavy cream and milk, you can store the un-frothed mixture in a sealed jar in the fridge for up to 5 days (or until the date on your milk carton). This makes it so easy to just pour, froth, and go on a busy morning!
Does the flavor of the coffee matter?
Not at all! Cold foam is a neutral, creamy base that works with everything. However, if you’re using a very bold, dark roast or a cold brew, I recommend a slightly sweeter foam (like the cheesecake or maple versions) to help balance out that extra bit of bitterness.

Cold Foam
Equipment
- A glass cup or jar (with lid if doing the jar method)
- Measuring Spoons
- Frother
Ingredients
- 2 tablespoons of heavy whipping cream
- 1 tablespoon of milk
- 1/2-1 teaspoon of syrup of choice
- A drop of vanilla extract- optional
Instructions
- Frother Method:
- Add heavy whipping cream, milk, syrup, and vanilla (if using), to a glass cup or jar and froth for about 10 seconds until the texture is airy and soft.

- Pour cold foam on top of drink and enjoy!
- Jar Method:
- Add heavy whipping cream, milk, syrup, and vanilla (if using), to a glass jar with a lid. Seal and shake the jar for 10 to 15 seconds until texture is airy and soft.
- Pour cold foam on top of drink and enjoy!
Have any questions? I’m happy to help. Just let me know! 🙂
-Lydia
I LOVE this cold foam recipe!
Great simple recipe! Sending it to a friend
Love this tutorial, packed with info. Thank you from one coffee lover to another.
Yessss! I love cold foam, it makes every drink so much better!
I have never tried cold foam, but it sounds delicious! It is on my list to make now.
Yum, love cold foam on my iced coffee! This is a great recipe!
Love this – very clear directions and something I can actually do easily! Thank you!!!!